
Copy the code and add your HTML file
Live Chat
The Live Chat widget adds smart instant messaging to your website enabling communication between you and your website visitors. For an overview of the widget visit the Live Chat page
Deploy Live Chat
To deploy the Live Chat widget on your website you will need to have access to your CMS or HTML files. The Live Chat widget is added by copying a Javascript code snippet into the body element of your HTML.
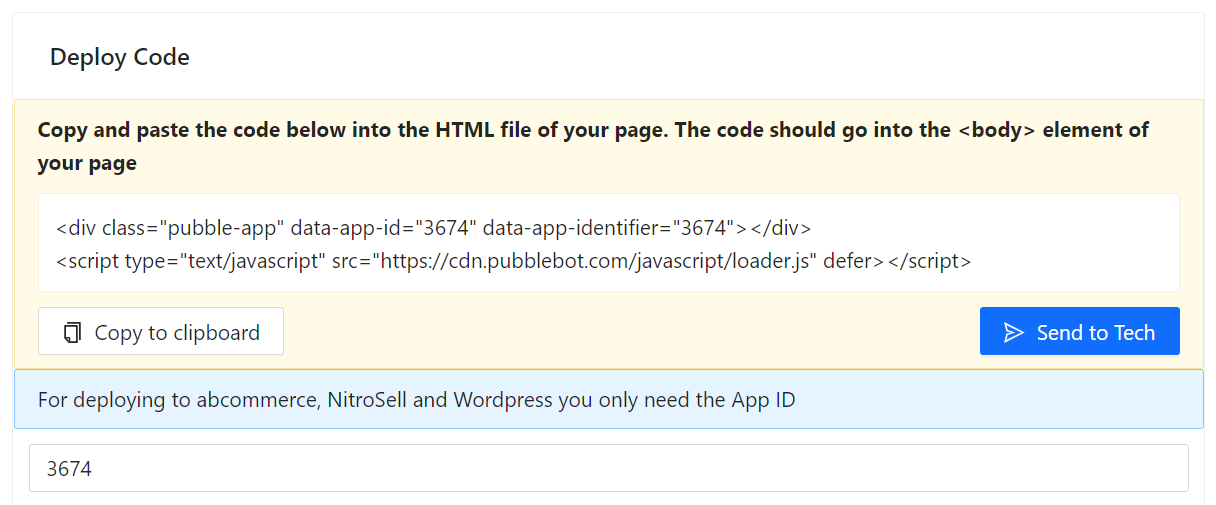
To get the code snippet, from the admin center go to Apps > Live Chat where you can see the deploy code.
The code will look similar to that below, just copy the Javascript segment into your HTML inside the <body> element, save and then you are good to go

If you do not have access to your CMS or HTML files, you can email the code snippet and instructions to your web master to help you to install. Simply click the "Send to Tech" button and enter the email address of your web master
On some websites or CMS if the Live Chat doesn't load, you may need to update the Content Security Policy directive to allow the necessary third-party scripts to be used in your pages. To run Pubble you need to allow: https://*.pubble.io and https://*.pusher.com
Advanced Data Attributes
If you already have a user logged into your system, you can pass their details (name / email) into the Live Chat widget so they would not need to re-enter their contact details when they ask a question. You can do this by adding additional data attributes to the code snippet and dynamically populate the values with the logged user details on page load.
Note: These are advanced options that will require a web developer to implement
| Data Attribute | Value |
|---|---|
| data-user-name | Name of logged user |
| data-user-email | Email of logged user |
| data-user-type | Custom label for user, could be "Lead", "Account", etc |
How the values are populated will depend on the technology used to serve your web pages. Below is a pseudocode example of how the code snippet might look:
<div class="pubble-app" data-app-id="1234" data-app-identifier="1234"
data-user-name="${user.name}" data-user-email="${user.email}" data-user-type="Lead"></div>
<script type="text/javascript" src="https://cdn.pubble.io/javascript/loader.js" defer></script>
data-user-name="${user.name}" data-user-email="${user.email}" data-user-type="Lead"></div>
<script type="text/javascript" src="https://cdn.pubble.io/javascript/loader.js" defer></script>
Live Chat Appearance
You can change the colours of the Live Chat widget, to do so visit the admin center and go to: Apps > Live Chat > App Colours
You will have the option to change the colour of the sidebar and the primary colour of the widget, which means the colour of the buttons and headers

Options on the left side, the results on the right
Live Chat Contact Options
You can decide to ask for contact details from a user either before they ask a question or after. By default users will be asked after to encourage them to communicate with you. You may however want to get contact details from a user before to avoid any frivolous questions.
To change the contact options go to the admin center: Apps > Live Chat > Registration Options

Registration options
You can also select which contact options you to get from the visitor: name, email and phone number
Below is a comparison of a Live Chat flow first requesting contact details before and requesting contact details after.

Requesting contact details before
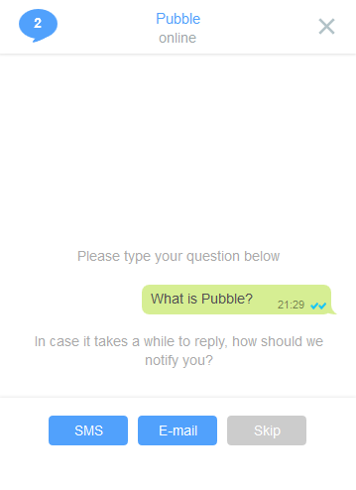
Requesting contact details after
Contact Card
If the visitor skipped inputting their contact details but you later require to capture them, you can prompt them to input by pushing a contact card into the conversation.
To push a contact card into the conversation select the option from the action menu:
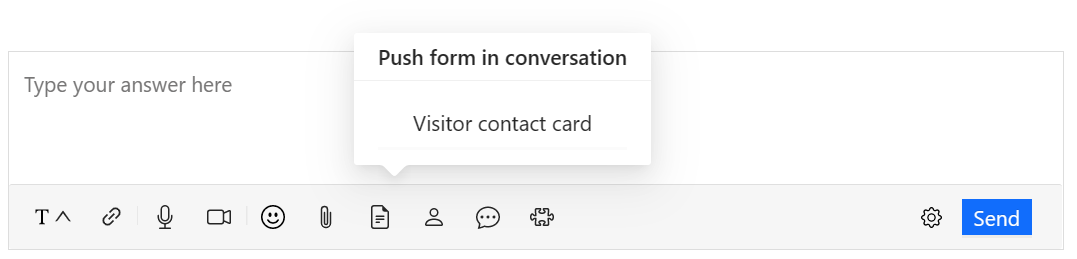
Selecting the contact card
In the dashboard you will see that a contact card has been pushed
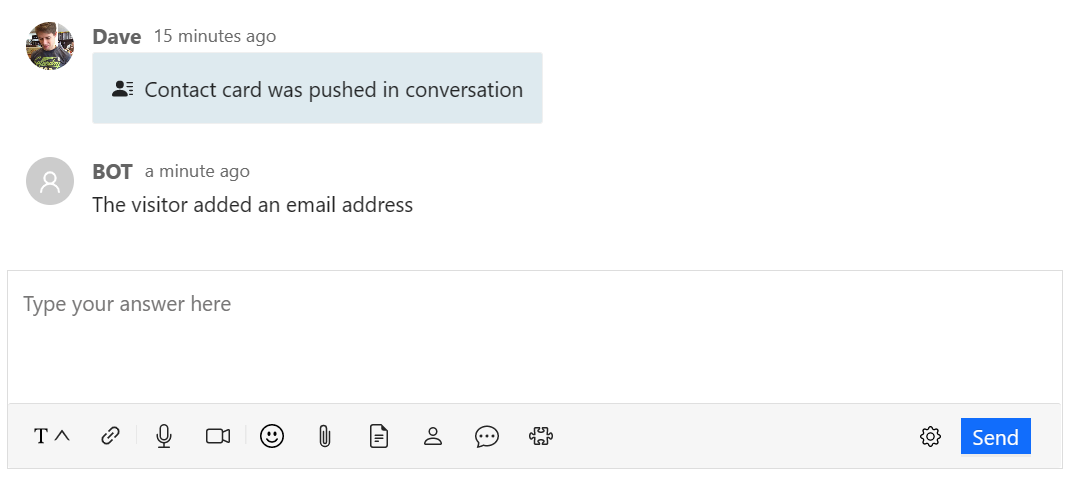
Contact card pushed to visitor
This is how it will appear for the visitor in the Live Chat widget:
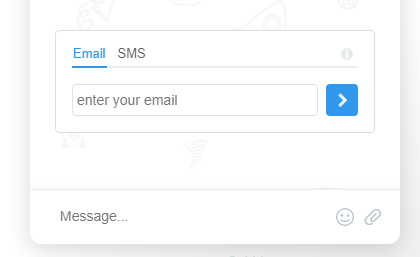
Contact card in Live Chat
Greeting Trigger
You can add a custom greeting trigger for all pages, or specific URLs on your website. A greeting trigger will pop-up a short message to the visitor letting them know you are there to help
By default the greeting will appear to come from an online team member, either a subscriber to the Live Chat app or a user assigned to that specific page. If there are no users online, then the greeting will come from either the custom community bot, or Pubblebot
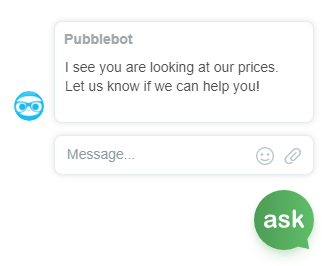
Example greeting
To add a greeting go to the admin center: Community > Actions > Add Greeting Rule

Greeting options
URL: You can define a full URL such as www.chatify.com/live-chat or you can define a path /live-chat you can also use a wildcard, for example to apply the greeting to all of your website can specify /*
Time on page: This is the elapsed time on the page until the greeting pop-up is triggered. This value will take precedence over the Time on Site value below
Time on site: This is the elapsed time on the website until the greeting pop-up is triggered
Display Always / Disable out-of-office hours / Disable: Here you can determine whether to disable the greeting when the team is out-of-office. If there are no office hours set, then this setting will have no effect.
Display bot profile only: Here you can select the greeting to be made by the bot always (either Pubblebot by default or the custom community bot, if defined)
Dashboard Visibility
You may not want the Live Chat app to be visible to all your team members. In the admin center you can change the visibility settings, which determines who can see the Live Chat app and receives notifications. Go to Apps > Live Chat
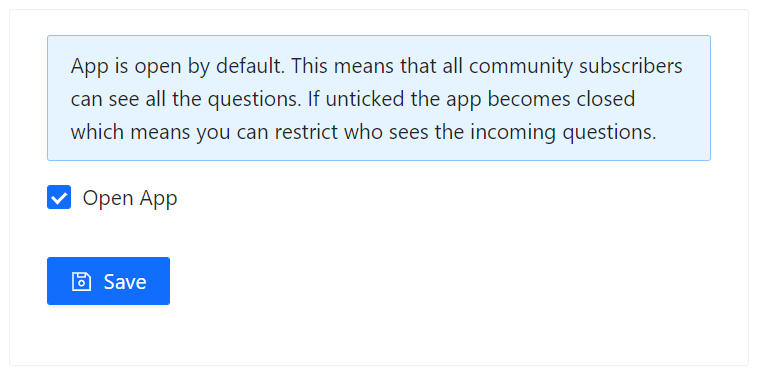
Changing the app visibility
The table below describes the different visibility states
| Visibility | Subscriber | |
|---|---|---|
| Open | Subscribed | Users can see Live Chat |
| Not Subscribed | Users can see Live Chat but won't get notifications | |
| Closed | Subscribed | Users can see Live Chat (same as 1) |
| Not Subscribed | Users can only see My Questions section and will only be notified of questions assigned to them |
Privacy (GDPR)
You can enable a consent checkbox on the Live Chat app that a user must tick before they provide any contact details.
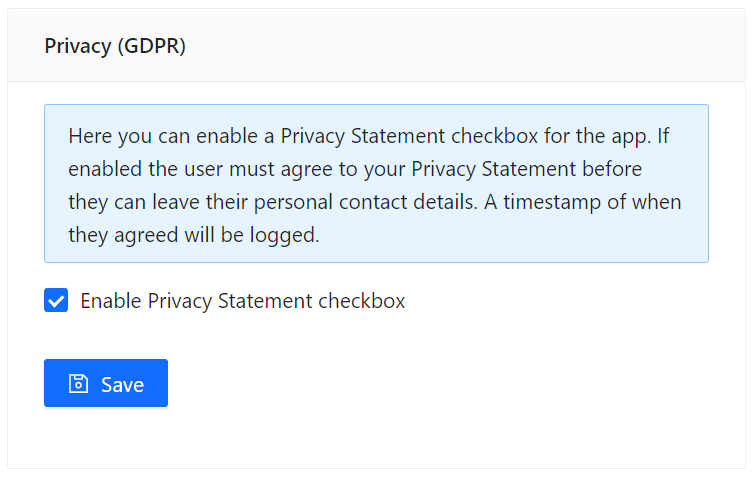
The privacy setting in the Admin Centre
Note: To enable this option you must first provide a Privacy Statement URL in the Privacy tab
Once enabled the following checkbox and Privacy Statement link will appear on the Live Chat app where users submit contact details:
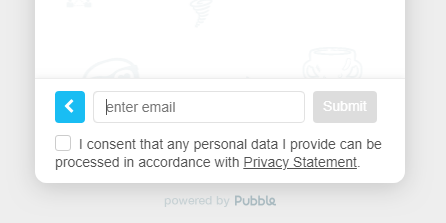
The consent checkbox on Live Chat
Wordpress
There are two ways to add Pubble to a Wordpress site.
Option 1: Adding Live Chat to your Wordpress template using our Wordpress Plugin. Installation instructions can be found on our Wordpress Plugin page
Install the Plugin on your site from the Plugin Section on WordPress, accessed from your Admin section. To do this, in your Wordpress admin panel, navigate to: Plugins > Add New > Search plugins > Pubble live chat > Install..
Once installed, you will see a message:
"You need to configure Pubble Live Chat to add live chat on your website. Please configure your Pubble Live Chat."
To configure the plugin you will need the APP ID of the Live Chat widget. You can obtain this from the Pubble admin center. Go to Apps > Live Chat In the Deploy Code section, copy the app ID (number): data-app-id="1234"
Copy the numeric app ID
With the APP ID, you can configure Pubble Live Chat on your website. To do this, in the Wordpress Admin section, you should have a message on top "You need to configure Pubble Live Chat to add live chat on your website. Please configure your Pubble Live Chat Live Chat." Click the link and enter the App ID in the input box.
Option 2: Adding Live Chat to a Single Page. Go to the Web Editor in Wordpress and shift to 'text mode' and paste the code snippet. This would be the option you would choose if you were running a Live Q&A or Live Blog. We do NOT advise using this approach for site wide deployment of Pubble.
Magento 1
The Pubble extension hooks into the head block of your Magento website and seamlessly adds the Pubble Live Chat script to every page. A service account is required to activate the Pubble extension.
You can download the extension here
Magento 2
We have an extension for Magento 2. Separate documentation for installing is available here
You can download the extension from the Magento Marketplace
Google Tag Manager
Please view our step-by-step guide here for installing Pubble Live Chat via Google Tag Manager
Google Analytics
The Live Chat app will trigger the following events in Google Analytics, under an event category called "pubble-messenger":
| Category | Event Name | Description |
|---|---|---|
| pubble-messenger | initiate | When a user initiates a question by clicking on the Pubble ASK icon |
| pubble-messenger | send | When a user hits the send button to submit a question |
| pubble-messenger | contact | When a user leaves a phone number or email address |
| pubble-messenger | faq-prompted | If an FAQ has been prompted for a question |
| pubble-messenger | faq-helped | If the user marked that an FAQ helped |
| pubble-messenger | faq-didn't-help | If the user marked that an FAQ didn't help |
| pubble-messenger | admin-reply | When the agent answers in real-time i.e. if the agent replies while the session is active |
| pubble-messenger | user-self-served | The user closed the question without an agent interaction |
From within Google Analytics, you can create a segment to measure conversions for users that interact with Pubble. Normally, our users create a segment for everyone who completes the 'send' event. The send event is anyone who submits a question on Pubble so it's a good event to track analytics on. Once the segment is created, you can then perform whatever e-commerce analytics you need.